Trenching is digging a long, narrow hole in the ground, usually to make a straight path for laying pipes or cables underground. It’s a crucial part of construction work, whether you’re installing water pipes, electrical or fibre cables, or drainage systems, but it’s not always taught in excavator training.
In the old days, workers had to dig trenches by hand using spades and shovels. Today, excavators make this job much faster and safer, and easier to get a consistent width and depth.
Why Choose an Excavator for Trenching?
Here’s why excavators are brilliant for trenching:
Efficiency Benefits:
- An excavator can dig a trench in hours that might take days by hand
- The machine can move large amounts of soil quickly and precisely
- One operator can do the work of many labourers
Safety Advantages:
- Workers don’t need to climb into deep trenches
- Reduced risk of injury from manual digging
- Better control over soil placement and trench stability
Versatility:
- Different attachments can be used for various tasks
- Can work in different soil types
- Able to dig trenches of various widths and depths
Pro Tip: When choosing an excavator for trenching, consider the project size; an excavator that’s too big is simply wasting money and fuel, and might be more of a hassle on a tight worksite.
Pre-Trenching Preparations
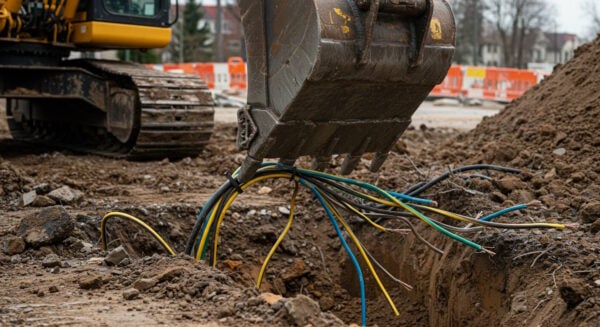
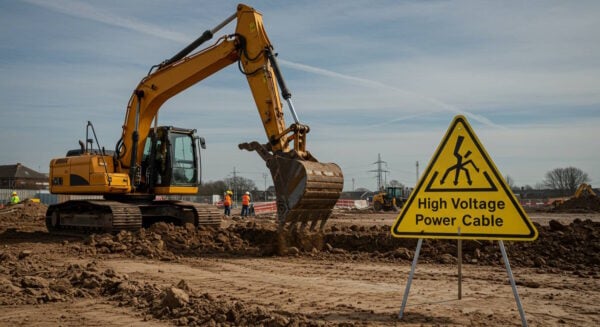
Utility Identification and Safety Checks
Before you even think about starting up an excavator, it’s crucial to know what’s underground.
Contact “Before U Dig”:
- In New Zealand, you must call or visit www.beforeudig.co.nz
- This free service helps identify underground services
- Wait for confirmation before digging.
Finding Underground Services:
- Use special detection equipment to locate pipes and cables. This could include ground penetrating radar or electromagnetic induction
- Mark locations with spray paint or flags
- Keep a minimum of 500mm distance from marked services.
Safety Distances:
- Stay at least 4m away from overhead power lines.
- Keep 2m clear of gas and water mains
- Document all service locations on your site plan.
Pro Tip: Take photos of all utility markings before you start digging – they’re handy if markings get washed away by rain.
Planning Trench Depth, Length and Placement
Good planning is like drawing a detailed map before going on a journey. Here’s how to plan your trench:
Marking Out:
- Use wooden stakes and string lines to mark the trench path
- Check for obstacles like tree roots or large rocks
- Consider slope and drainage requirements.
Environmental Factors:
- Check weather forecasts – avoid trenching in heavy rain
- Look for signs of previous excavation
- Note any nearby trees or structures
- Consider soil type and stability – will you need to shore the trench?
Measurements:
- Mark required depth at intervals
- Allow extra width for safety barriers
- Plan spoil pile locations (excavated soil).
Pro Tip: Always add an extra 100mm to your planned depth to allow for bedding material (‘fines’) under pipes or cables.
Choosing the Right Equipment for Trenching
Types of Excavators for Trenching
Compact (Mini) Excavators:
- Perfect for backyard work
- Can fit through garden gates (1-2 metres wide)
- Good for trenches up to 2.5m deep
- Best for working around houses and tight spaces
- Weight: 1-6 tonnes
Medium Excavators:
- Great for most construction sites
- Can dig trenches up to 4m deep
- More stable than mini excavators
- Better for longer jobs
- Weight: 7-15 tonnes
Large Excavators:
- Used for major projects
- Can dig deep trenches (4m+)
- More powerful for hard ground
- Need lots of space to work
- Weight: 16+ tonnes
Pro Tip: Remember, bigger isn’t always better! A mini excavator might be perfect for your job and costs less to run.
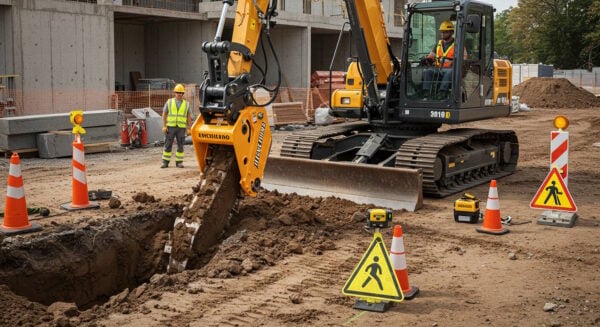
Essential Excavator Attachments

Just like your phone needs different apps for different tasks, excavators need different attachments:
Trenching Buckets:
- Narrow bucket for digging trenches
- Usually 300-600mm wide
- Sharp teeth for cutting through soil
- Different sizes for different trench widths.
Tilt Buckets:
- Can angle side to side
- Great for sloping trenches
- Better control when grading
- Perfect for drain laying.
Extra Tools:
- Rock breakers for hard ground
- Compaction wheels for filling trenches
- Quick hitches for changing attachments easily.
Pro Tip: Keep your bucket teeth sharp – dull teeth make digging harder and slower, just like trying to cut bread with a blunt knife!
Safety Note: Always check that attachments are properly locked before starting work. A falling bucket can be very dangerous!
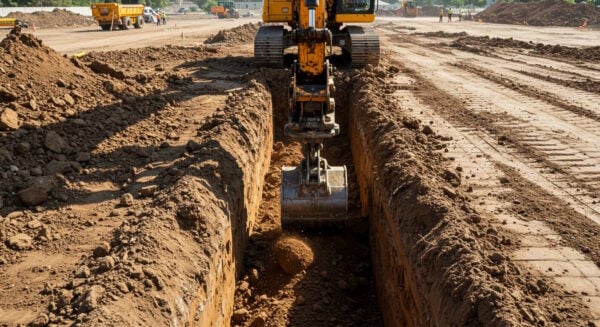
Step-by-Step Trenching Process
Think of digging a trench like eating a big meal – you need to take it one bite at a time. Start by removing the topsoil layer carefully. This is the good soil that plants grow in, so you’ll want to keep it separate to put back on top when you’re finished.
When you begin digging the actual trench, start at one end and work backwards. This way, you’re not driving over the area you need to dig. Make your first pass shallow – about half a meter deep. It’s better to take several passes than try to dig too deep at once, which can make the sides of your trench unstable.
If you’re digging a deep trench (over 1.5 meters), you’ll need to think about how to keep the sides from falling in. This might mean stepping the sides back (called benching) or using special supports (called shoring).
Pro Tip: Always pile the dirt (called spoil) at least a metre back from the edge of your trench. If you pile it too close, the weight can make the sides collapse. Also, keep your spoil on one side only – this leaves the other side clear for pipes or cables to be delivered.
Understanding Soil Conditions for Safe Trenching
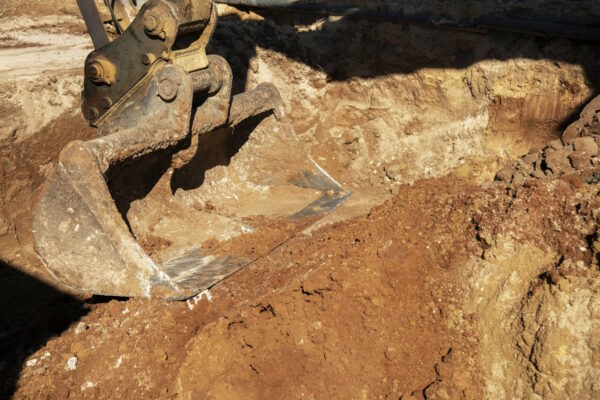
Soil is more complicated than it might seem – it’s not just dirt! Understanding what type of soil you’re digging in is crucial for safe trenching. We often deal with different types of soil even on the same site.
Clay soil is like plasticine – it sticks together well when dry but gets slippery when wet. It’s usually stable for trenching, but after rain it can become dangerous. Sandy soil is like working with dry beach sand – it wants to run back into your trench as fast as you can dig it out. This type needs extra support to keep the walls from collapsing.
Water management is a huge part of trenching. Think of soil like a sponge – when it gets too wet, it becomes heavy and unstable. That’s why you need to plan for drainage. Sometimes you’ll need pumps to keep water out of your trench, especially after rain or if you hit groundwater.
Pro Tip: If you squeeze a handful of soil and it holds its shape, it’s probably clay. If it falls apart, it’s likely sandy. This simple test can help you decide what safety measures you need.
Installing Utilities and Backfilling the Trench
Once your trench is dug, it’s time to install whatever is going in there – pipes, cables, or drainage systems. This part needs to be done carefully because whatever you’re installing will be underground for a long time.
First, you need to create a nice flat bed for your pipes or cables. Usually, this means putting down a layer of sand or fine gravel. Think of it like making a bed – you want a nice flat surface for whatever you’re installing to lie on.
Backfilling isn’t just about dumping the soil back in. You need to do it in layers, compacting each layer as you go. It’s like making a sandwich – you build it up bit by bit. The first layer over your pipes or cables should be soft material like sand, to protect them from damage.
The final layer should be the topsoil you saved from the beginning. This goes back on top because it’s the good soil that plants can grow in. Make sure the ground is slightly mounded over the trench – it will settle over time.
Safety Measures When Trenching with an Excavator
Safety isn’t just about following rules – it’s about going home to your family every day. When you’re operating an excavator, you’re in charge of a powerful machine that could be dangerous if not used correctly.
Start by wearing the right gear: steel-toe boots, high-visibility clothing, and a hard hat. Your excavator should have a Roll Over Protection Structure (ROPS) and you should always wear your seatbelt. It might seem silly when you’re moving slowly, but if something goes wrong, these simple things could save your life.
Before starting work each day, check your working area. Look for overhead power lines – remember that electricity can ‘jump’ through the air, so stay at least 4 meters away. Check that the ground is stable enough to support your machine. Be especially careful after rain when the ground might be softer than usual.
Never let anyone walk under your boom or bucket, and always lower your bucket to the ground when you’re not digging. If you need to leave the machine, even for a short time, turn it off and take the key. This prevents anyone from accidentally starting it while you’re away.
Conclusion
At the end of the day, safe and efficient trenching comes down to good planning, the right equipment, and proper safety practices. Think of it as a recipe – you need all the right ingredients and steps to make it work properly.
Let’s recap the most important points to remember:
Always start with proper planning:
- Check for underground services by contacting Before U Dig NZ
- Get the right permits and permissions
- Choose the right size excavator for your job
- Plan your spoil pile locations
Safety must always come first:
- Never enter unsupported trenches deeper than 1.5 metres
- Keep soil piles at least 1 metre back from the trench edge
- Always wear proper safety gear (hard hat, steel-toe boots, hi-vis)
- Check weather forecasts – avoid trenching in heavy rain
Pro Tips from Experienced Operators:
- Take your time – rushing leads to mistakes
- Listen to your machine – unusual noises mean something’s wrong
- Keep your work area tidy – a messy site is a dangerous site
- If something doesn’t feel right, stop and check it out
- Always have a spotter when working near services or in tight spaces
Trenching might seem straightforward, but it requires skill and knowledge to do it safely and efficiently. When in doubt, get professional help. It’s better to ask questions than to make mistakes that could be dangerous or costly.

Darren has written over 3000 articles about driving and vehicles, plus almost 500 vehicle reviews and numerous driving courses. Connect with him on LinkedIn by clicking the name above