
Choking happens when something blocks the airway, partially or completely. It’s most common during meals (a piece of meat, a chunk of bread, a marble in a child’s case) but can also involve dust, vomit, or any foreign object that ends up in the wrong tube. Without air, brain damage starts within four to six minutes, so a complete blockage is a time-critical emergency.
What you do depends on whether the choking is mild or severe. Recognising the difference matters. Choking can happen anywhere, which is why we recommend doing this first aid training.
Mild versus severe choking
Mild choking: the person can still cough, speak, or breathe, even if it’s noisy or laboured. Their cough is more effective than anything you can do. Stay with them, encourage them to keep coughing, and don’t interfere. Don’t slap their back while they’re coughing effectively; you may dislodge the object further down the airway. Just watch closely.
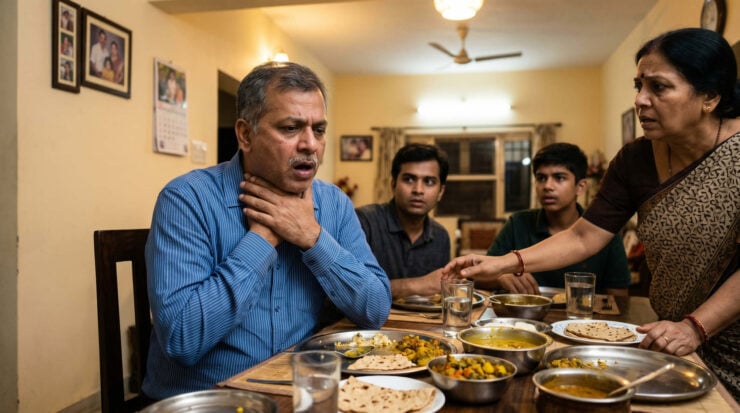
Severe choking: the person can’t cough effectively, can’t speak, and can’t breathe. They may clutch their throat with one or both hands (the universal choking sign). Face goes red, then blue. They look panicked. This is when you act, and you act fast.
Why New Zealand uses back blows and chest thrusts, not the Heimlich
The New Zealand Resuscitation Council and the Australian and New Zealand Committee on Resuscitation (ANZCOR) recommend back blows and chest thrusts for foreign body airway obstruction. Abdominal thrusts (the manoeuvre many people know as the Heimlich) are not the recommended technique in New Zealand workplace first aid. The reason is published case reports of life-threatening complications from abdominal thrusts, including ruptured spleen, lacerated liver, and torn aorta. Back blows and chest thrusts achieve the same result with less risk.
If you were taught the Heimlich years ago, this is the update. The current NZ guidance is alternating five back blows with five chest thrusts. You may still encounter abdominal thrusts in older training materials or imported content; the local position is what to follow on a New Zealand worksite.
Back blows: technique
Stand to the side and slightly behind the choking person. Support their chest with one hand and bend them forward at the waist so their head is lower than their chest. Gravity is your friend here; the goal is to shift the object up and out, not push it further down.
With the heel of your other hand, deliver up to five firm blows between the shoulder blades. Check after each blow. The aim is to dislodge the object with each individual blow, not to mechanically deliver all five. If it comes out after two, stop.
Chest thrusts: technique
If five back blows haven’t worked, move to chest thrusts. Stand behind the person and wrap your arms around their chest, just under the armpits. Make a fist with one hand, thumb side inwards, and place it in the middle of the breastbone (the same spot you’d compress for CPR). Grasp your fist with your other hand. Pull sharply inwards and slightly upwards. Up to five times.
Chest thrusts are similar to CPR compressions but sharper and slower. They use the pressure in the chest to push air up through the airway and force the object out.
If chest thrusts don’t work, go back to five more back blows, then five more chest thrusts. Keep alternating until the object dislodges, the person can breathe, or they become unconscious.
Force matters. A polite pat will not shift a piece of steak. The action needs to be hard enough to create real pressure in the airway. You may bruise the person. That’s acceptable. Suffocation is not.
If the person becomes unconscious
Lower them carefully to the ground. Call 111 immediately if no one has already. Start CPR. The chest compressions will continue the pressure that may dislodge the object, and rescue breaths can get air past a partial obstruction. Each time you open the airway to give breaths, look in the mouth. If you see the object, carefully remove it. Don’t do blind finger sweeps; you can push the object deeper. Continue CPR until help arrives, the obstruction clears, or the person starts breathing normally.
Infants and small children
Infants (under one year) need a modified technique. Sit down and lay the infant face-down along your forearm with the head lower than the body. Support the head and jaw. Give up to five back blows between the shoulder blades with the heel of your other hand.
If that doesn’t work, sandwich the infant between your arms and turn them face-up, still with head lower than body. Place two fingers in the centre of the chest just below the nipple line and give up to five chest thrusts. Sharp and slow, similar to CPR compressions but more deliberate.
Do not use abdominal thrusts on infants. Their abdominal organs are still developing and at higher risk of injury.
Workplace scenarios and prevention
A common workplace choking event is a worker eating quickly during a short break. Consider a driver at a transport depot lunchroom, eating a sandwich while answering radio calls. A chunk of beef gets stuck. He stands, grabs his throat, can’t make a sound. A colleague gets behind him, bends him forward at the waist with one hand on his chest, and delivers a sharp back blow between the shoulder blades. On the second blow the meat dislodges and he can breathe. Total elapsed time: under 20 seconds.
After any successful choking intervention, the person should still see a doctor. Aggressive back blows or chest thrusts can cause internal injuries that aren’t obvious at the scene, and the person should also be checked for any residual airway problems.
Prevention is worth a mention. Workers eating fast, talking while eating, or working through their lunch break are higher risk. People with stroke, Parkinson’s, dementia, or any condition affecting swallowing are higher risk. Older workers with poor dentition are higher risk. Where it’s practical, encouraging unhurried meal breaks reduces the chance of needing this skill in the first place.


Darren has written over 3000 articles about driving and vehicles, plus almost 500 vehicle reviews and numerous driving courses. Connect with him on LinkedIn by clicking the name above