Permanent warning signs are mostly yellow with a black border and black writing with a few exceptions.
 |
Speed cameras may be present |
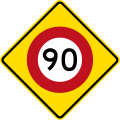 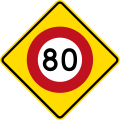 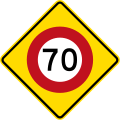 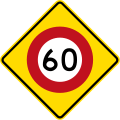 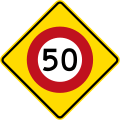    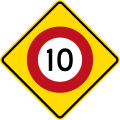 |
Warns of a speed limit coming up ahead, for example, if you are on a motorway where the limit is 100kph you could see the 50kph sign on the off-ramp as you approach an urban area |
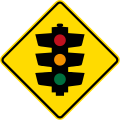 |
Traffic lights ahead |
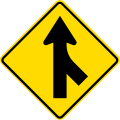  |
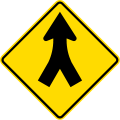
Traffic is merging from a side road, as indicated |
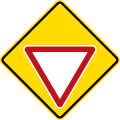 |
Give way ahead |
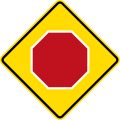 |
Stop sign ahead |
 |
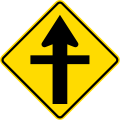
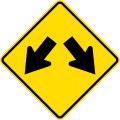
Traffic is merging from both sides |
    |
Direction signs appended to warning signs such as the stop, give way or speed limit signs above |
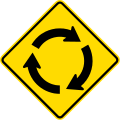 |
Roundabout ahead |
 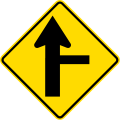        |
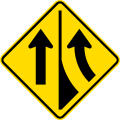
The priority road is shown by the thicker arrow, and an adjoining road is shown. |
  |
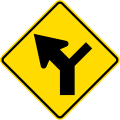
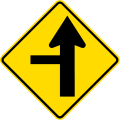
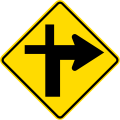
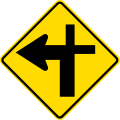
Uncontrolled intersection on the left or right, as indicated |
 |
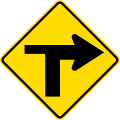
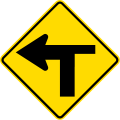
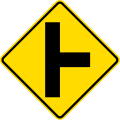
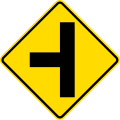
Uncontrolled T-intersection |
 |
Road diverges |
 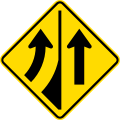 |
Traffic joins from the left or right in a separate lane |
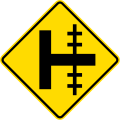 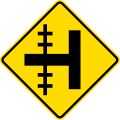     |
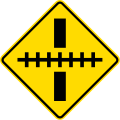
Railway crossing on a side road, as indicated |
  |
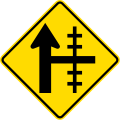
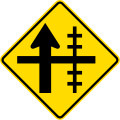
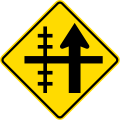
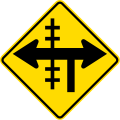
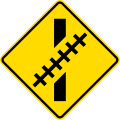
Railway crossing on an uncontrolled T-intersection |
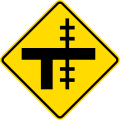
  |
Railway crossing on a controlled T-intersection |
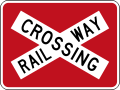 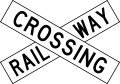 |
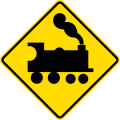
Railway crossing |
   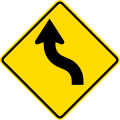   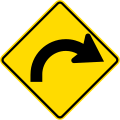 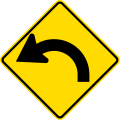  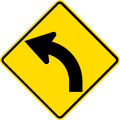 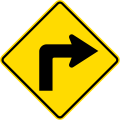  |
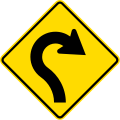
Signs indicating the direction of the road ahead and the severity of the bends |
         |
Recommended speeds for a corner indicated, in kph. Note that they end in 5 to avoid confusion with speed limits which always end in 0 |
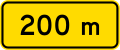
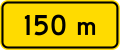
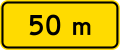
| Distance indicators for a sign which will appear above it, for example winding road or falling rocks | |
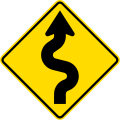  |
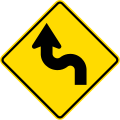
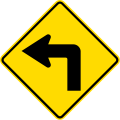
Signs indicating a series of curves ahead. The sign shows which way the first curve turns. Often a distance indicator such as ‘Next 2km’ may appear underneath a sign like this |
 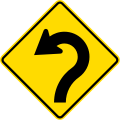 |
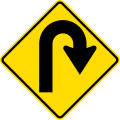
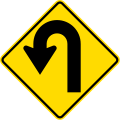
Reverse curve with decreasing radius (i.e. the curve tightens) |
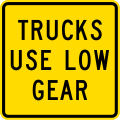 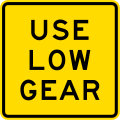 |
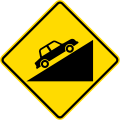
This sign usually indicates a gradient and lets you know you should change down a gear either to help with engine braking, or to give more torque for maintaining speed uphill |
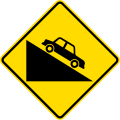  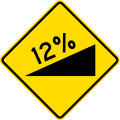 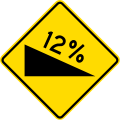 |
Signs showing a gradient and its direction. The gradient may be shown if it is steep |
| Concealed exits may mean that slow traffic is turning into or out of a hidden driveway or side road. | |
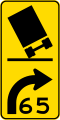  |
Trucks need to be careful of tipping over. This may be relevant if the corner is adverse camber, for example |
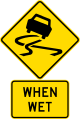 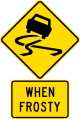 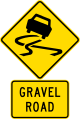 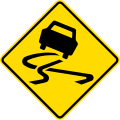 |
Indicates the road may be slippery and a specific reason, if relevant |
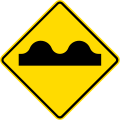   |
Indicates uneven road surface, bump or dip |
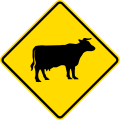 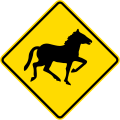 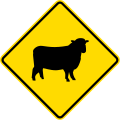 |
Animals may be present on the roads |
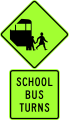 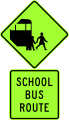  |
School bus warning signs. Watch for buses stopping to let children off or pick them up, and remember there is a 20kph speed limit when passing a stationary school bus |
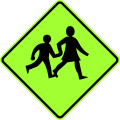   |
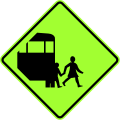
Signs warning that children may be on the road |
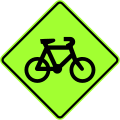 |
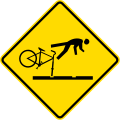
Cyclists may be around |
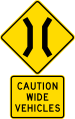 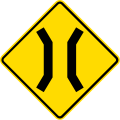 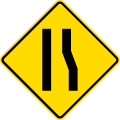 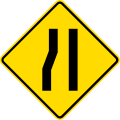 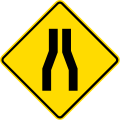 |
The road narrows, as indicated |
 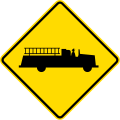 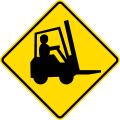 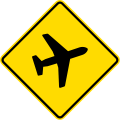 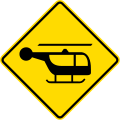 |
Signs indicating specific vehicles may be on the road (such as trucks, fire engines [because of a nearby fire station] or forklift trucks and work vehicles [because of a nearby industrial area]), or overhead and flying low (such as aeroplanes or helicopters) |
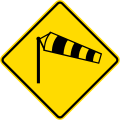 |
Strong cross winds may occur. Take care when passing larger stationary objects such as buildings as when you clear the object the wind gust may significantly affect your vehicle. This also applies if you are passing longer large vehicles such as articulated trucks |
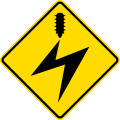 |
Overhead electric cables |
 |
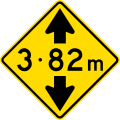
Maximum height marker |
 |
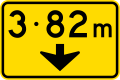
Maximum overhead clearance ahead |
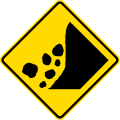 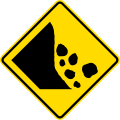 |
Danger of falling rocks, with the side indicated on the sign |
   |
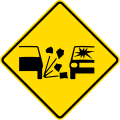
Warning signs with the danger indicated |
 |
Loose road surface. Stones may flick up and crack a windscreen |
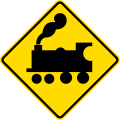  |
Uncontrolled railway crossing ahead |
 |
General warning sign |
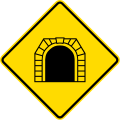 |
Tunnel ahead. This may also be accompanied by a maximum clearance sign |
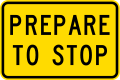 |
Prepare to stop ahead |
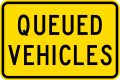  |
Hidden queue may be present – pay particular attention to these on holiday weekends when extra traffic can lengthen queues, often at one-way bridges and intersections from side roads onto main routes |
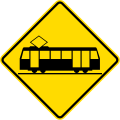  |
Light rail crossing |
   |
Railway crossing ahead, showing the angle of the crossing, as indicated |
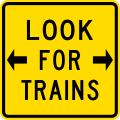 |
Look both ways for trains before crossing |
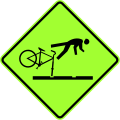  |
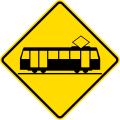
Warning to cyclists to take care crossing rail tracks |
 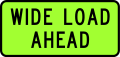 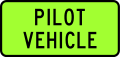  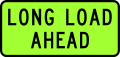   |
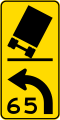
General vehicle-mounted warning signs indicating oversized vehicles |
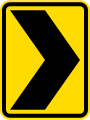  |
Chevrons indicating road direction, and suggested speed if necessary |
| End of road markers – used at T-intersections | |
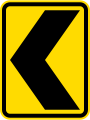
| Roundabout hazard marker |

Darren has written over 3000 articles about driving and vehicles, plus almost 500 vehicle reviews and numerous driving courses. Connect with him on LinkedIn by clicking the name above