
The recovery position is a stable side-lying position used to maintain a clear airway in someone who is unconscious but breathing normally. It works by using gravity. When an unconscious person lies on their back, the tongue relaxes and can fall against the back of the throat, blocking the airway. Vomit, blood and saliva can pool there too. Rolling them onto their side lets the tongue fall forward and any fluid drain out of the mouth.

ANZCOR’s (Australian and New Zealand Committee on Resuscitation) position is straightforward: in a non-traumatic incident (no risk of spinal injury), a first aid provider should maintain an open airway for any person who is unresponsive and breathing normally by moving them onto their side and tilting their head back.
When to use it (and when not to)
We go into more detail in our online first aid refresher course, including how to put a person in the recovery position safety, but read on for an overview.
Use the recovery position when the patient is unconscious, breathing normally, and there’s no suspected spinal injury. Also use it for anyone who is vomiting and cannot protect their own airway, including an unconscious patient who throws up during your assessment.
Don’t use it for a patient who is not breathing normally (start CPR instead), and don’t use it for a conscious patient who can protect their own airway. Suspected spinal injury complicates things: if medical help is arriving soon and you can keep the airway open with a head tilt chin lift or jaw thrust where they are, leave them in position. If help is further away or you can’t maintain the airway, the priority is still the airway. ANZCOR recommends turning the patient into a side-lying position while maintaining spinal alignment if possible. Two rescuers make this much easier than one.
The technique, step by step
Kneel beside the patient at about waist level. Straighten both their legs.
Place the arm nearest to you out at right angles to their body, elbow bent at 90 degrees, palm facing upwards. This arm stops them rolling too far towards you.
Bring their far arm across their chest. Put the back of that hand against their near cheek (the cheek closest to you) and hold it there.
With your other hand, grab their far leg just above the knee and pull it up so the foot stays flat on the ground.
Now you have the leverage you need. Keeping their hand pressed against their cheek, pull on the bent knee to roll them onto their side, towards you. The bent leg supports them; the first arm you positioned stops them rolling onto their face.
Adjust the upper leg so the hip and knee are both bent at roughly 90 degrees. This stops them rolling backwards. Tilt the head back gently to keep the airway open. Check the mouth is slightly open and pointing downwards so fluid can drain. Make sure nothing is restricting their chest.
Pregnant patients
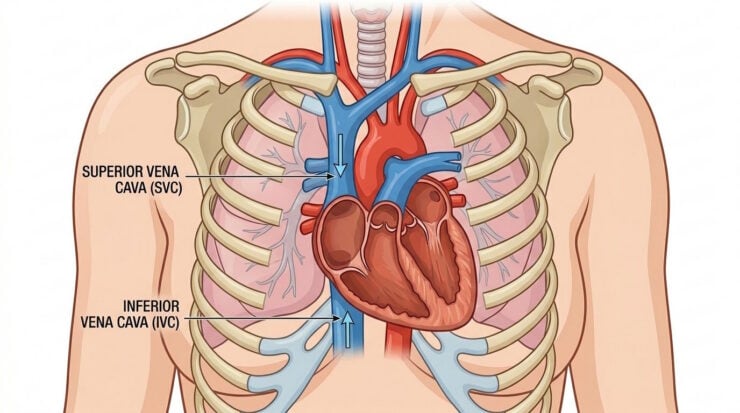
A pregnant patient who is unconscious and breathing should be placed in the recovery position on her left side. The reason is the inferior vena cava, a large vein that runs up the right side of the spine. Lying on the back or right side can compress that vein under the weight of the uterus, reducing blood return to the heart and dropping blood pressure. Left lateral position avoids that compression.
Once they’re in position
Check their breathing regularly while you wait for help. ANZCOR recommends regular re-checks, ideally every minute or two. If breathing stops or becomes abnormal, roll the patient onto their back and start CPR immediately.
If you’re going to be waiting more than about 30 minutes, consider rolling them onto the opposite side to reduce pressure on the arm and shoulder underneath. Use the same technique, just from the other side.
When they start to come round (groaning, moving, opening their eyes), talk to them calmly and explain what’s happened. Don’t let them jump up. They’ll likely be disoriented and unsteady. Help them sit up slowly, then give them time before they try to stand.
A workplace scenario
A warehouse team member comes into the office to drop off paperwork, and collapses in the corridor. By the time you reach him he’s unconscious. You check for danger (the corridor is clear), confirm he’s unresponsive, and send a colleague to call 111. You open his airway with head tilt chin lift and check breathing. He’s breathing normally. There’s no obvious sign of trauma; he simply collapsed where he was standing.
You roll him into the recovery position following the steps above. You note the time. You stay with him, checking his breathing every minute or so. After about four minutes he starts to stir, groans, then opens his eyes briefly. You speak to him by name and tell him the ambulance is on the way. By the time the paramedics arrive he’s confused but talking, and you can hand over a clear timeline: collapsed at 16:42, unresponsive when you reached him, breathing normally throughout, started responding to voice around 16:46.
That handover is what makes the recovery position more than just “put them on their side”. It’s an active management position that keeps the patient safe while you observe and document what’s happening.


Darren has written over 3000 articles about driving and vehicles, plus almost 500 vehicle reviews and numerous driving courses. Connect with him on LinkedIn by clicking the name above